
There are many sensible causes to switch a website. Your present registrar might have raised costs, help could be sluggish, otherwise you merely wish to consolidate renewals and DNS administration in a single place. Shifting a website to a registrar that matches your finances and workflow makes ongoing web site administration simpler.
Excellent news: transferring a website shouldn’t be costly or tough. Most transfers end in about 5 to seven days when you’ve accomplished a couple of fast conditions. Under, we’ll stroll via seven clear steps to maneuver your area from one registrar to a different with out downtime.
Switch A Area Title in 7 Simple Steps
Transfers go quickest once you prep the appropriate information up entrance. Observe these seven steps to make your transfer easy:
- Signal Up for GoDaddy
- Make Positive Your Area Is Eligible
- Unlock Your Area
- Get an Authorization Code
- Add Your Area To Your New Registrar
- Replace Your Area Particulars In GoDaddy
- Delete Your Outdated Registrar Account
For this tutorial, we’ll be utilizing GoDaddy. It’s some of the established registrars with aggressive switch pricing and stable instruments. Join now to switch your area for as little as $9.99, and get a 1-year extension on most TLDs included.
Step 1: Signal Up for GoDaddy
Step one is creating an account along with your new registrar.
We’ll use GoDaddy right here, however these steps are related at most registrars. GoDaddy is inexpensive, standard, and security-focused—necessary traits once you’re managing worthwhile domains.
To start, go to GoDaddy’s dwelling web page, click on Signal In, then select Create an Account. Add your particulars and allow two-factor authentication (2FA) for further safety. Use a contact e-mail you management that does not depend upon the area you’re shifting, so that you don’t miss verification emails through the switch.
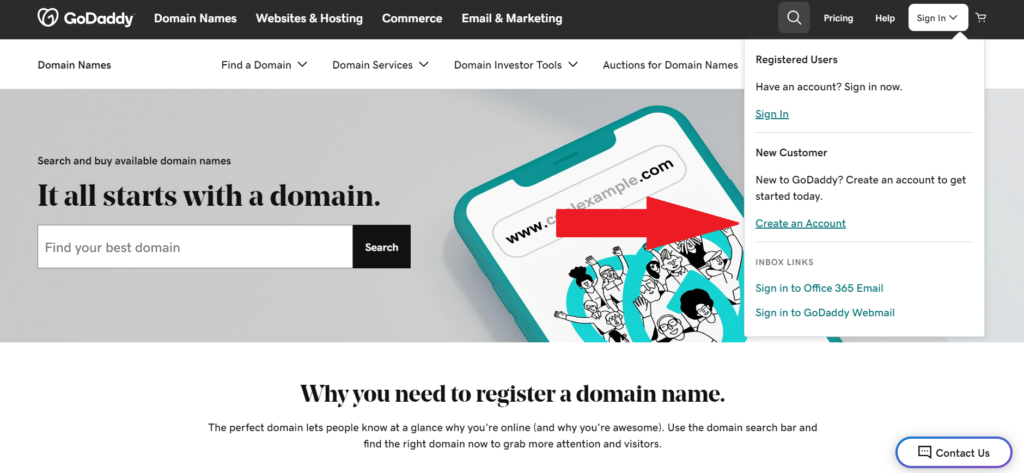
As soon as your account is created, open your GoDaddy dashboard—you’re prepared for eligibility checks.
Step 2: Make Positive Your Area Is Eligible
Earlier than you begin the switch, affirm that your area might be moved proper now.
Most gTLDs (like .com, .internet, .org) can’t be transferred inside 60 days of preliminary registration or a change of registrant. Some registrars allow you to decide out of the 60-day lock once you change contact information, however many maintain it enabled by default. Nation-code TLDs (like .uk, .de, .io) might have further guidelines and timelines.
Subsequent, confirm that your area contact info is present—particularly the registrant/administrative e-mail—and you can obtain emails at that handle. In case your e-mail is tied to the area (e.g., you@yourdomain.com), set a backup handle on a separate area to keep away from interruptions through the transfer.
Lastly, examine your area’s standing at your present registrar. You wish to see a standing that permits transfers (not clientTransferProhibited). When you’ve confirmed eligibility and up to date your contact/billing information, proceed.
Step 3: Unlock Your Area
Domains are sometimes locked to stop unauthorized strikes. To switch, you’ll must disable the switch lock.
Many registrars allow you to toggle this your self from the area dashboard. For instance, with Hostinger, you may flip the Switch Lock off with a easy change:
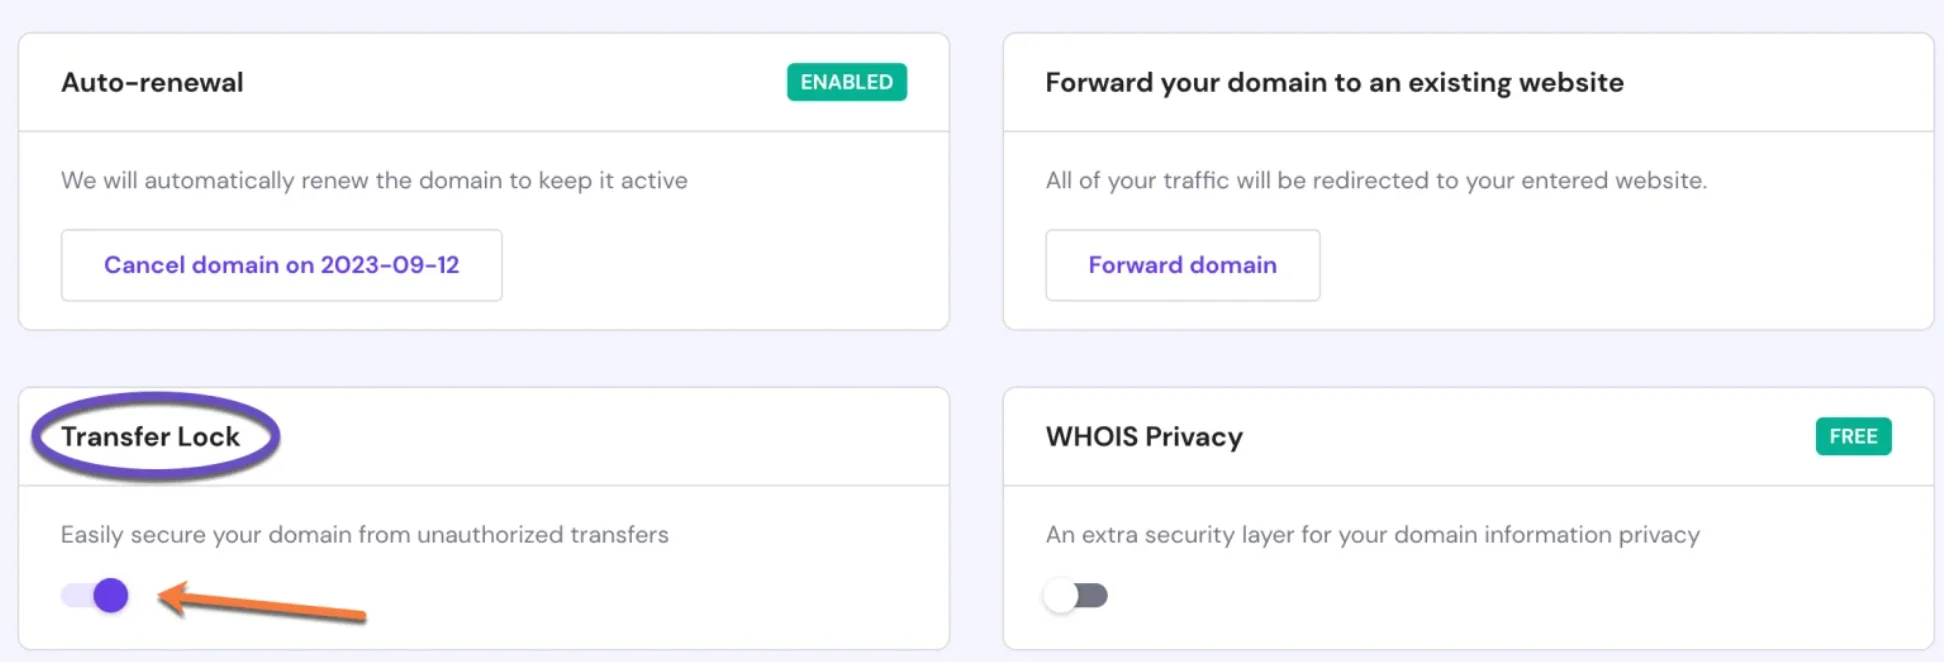
Some suppliers require you to contact help to request unlocking. In the event you don’t see an “Unlock Area” possibility, open a ticket or e-mail help and be able to confirm possession along with your login and billing particulars.
Unlocking doesn’t change your DNS or take your web site offline. Go away your nameservers and DNS data as-is for now to keep away from downtime.
As soon as unlocked, proceed to acquire your authorization code.
Step 4: Get an Authorization Code
Additionally referred to as an EPP code or switch code, this brief code proves you personal the area and authorizes the switch.
Many registrars allow you to generate or request the code out of your area dashboard and can e-mail it to your registrant/admin e-mail. Others require a help request for safety causes. Codes might expire after a brief interval, so use them promptly.
Maintain the code personal. When you’ve gotten it, you’re able to kick off the switch at your new registrar.
Transfer on to the following step when you’ve gotten your code in hand.
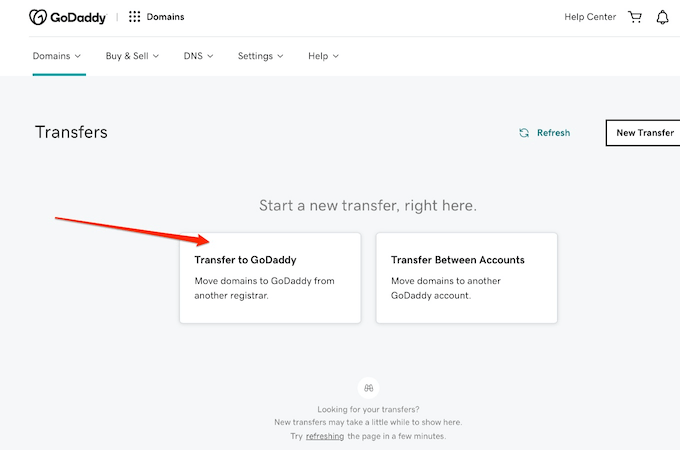
Step 5: Add Your Area To Your New Registrar
With the lock disabled and your authorization code prepared, begin the switch in GoDaddy.
In your dashboard, go to Area Names > Switch Area Names.
Enter your area title with out http/https (e.g., yourdomain.com) and paste your authorization code when prompted. Throughout checkout you may select privateness, auto-renew, and nameserver choices. In case your web site and e-mail are hosted elsewhere, maintain your present nameservers to keep away from downtime; you may change DNS later after the switch completes.
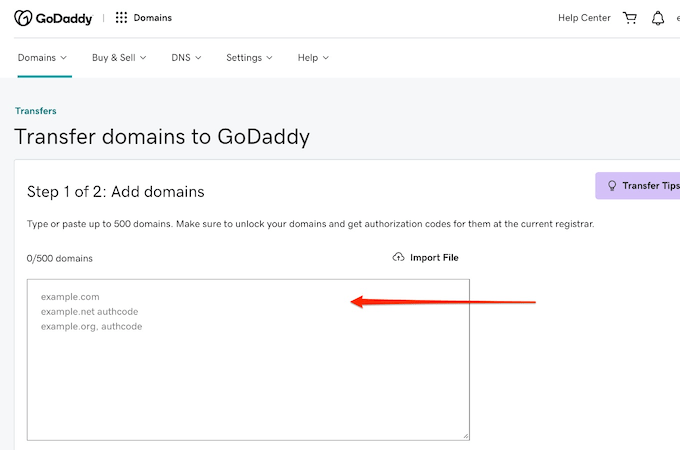
If GoDaddy flags a difficulty—just like the area nonetheless being locked or an auth-code mismatch—double-check spelling, affirm the lock is off at your present registrar, and confirm your code is present.
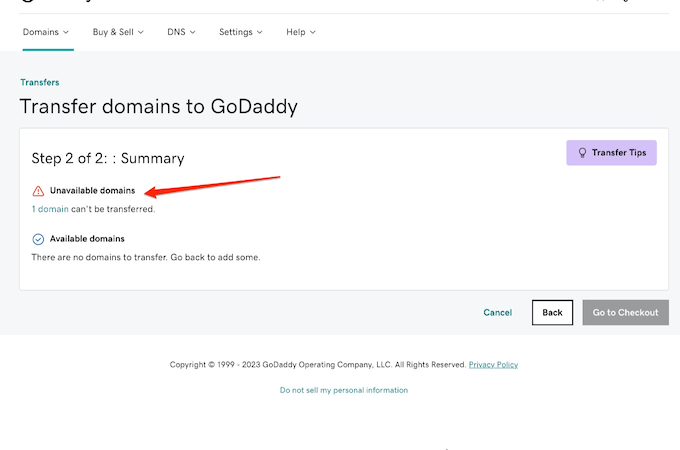
When your area is accepted, pay for the switch. GoDaddy’s switch pricing is often budget-friendly, and most TLDs embrace a 1-year extension of your present expiration date.
After checkout, look ahead to affirmation emails at each registrars. Transfers usually full inside 5–7 days, however many dropping registrars allow you to approve the switch to launch it sooner.
When you see the area in your GoDaddy account, proceed to post-transfer checks.
Step 6: Replace Your Area Particulars In GoDaddy
After the switch completes, affirm every part is right and safe in your new account.
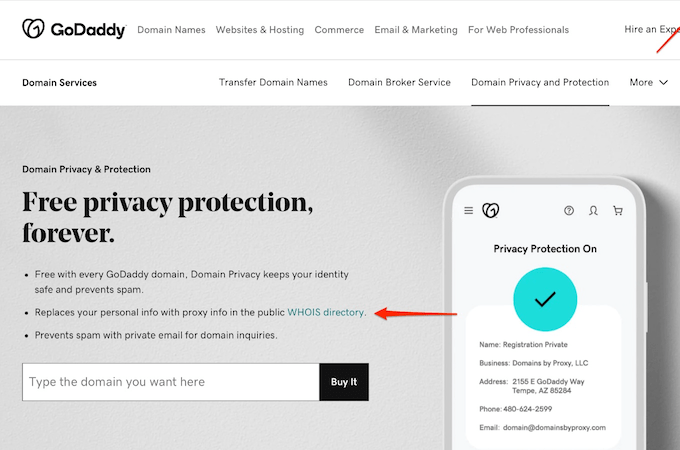
Open your area settings and overview your contact particulars. Allow free privateness so your private info isn’t publicly seen in WHOIS. Flip Area Lock again on to stop unauthorized strikes, and maintain 2FA enabled for account safety.
Subsequent, overview DNS. In the event you stored your prior nameservers, your web site and e-mail ought to proceed working. In the event you plan to maneuver DNS to GoDaddy, copy over your A/AAAA, CNAME, MX, and TXT data first, decrease TTL if wanted, after which change nameservers to keep away from any interruption.
Lastly, go to your area in a personal browser to make sure it masses with out errors and that e-mail nonetheless delivers as anticipated. When every part checks out, you’re prepared for cleanup.
Proceed to the final step.
Step 7: Delete Your Outdated Registrar Account
Now that your area lives in GoDaddy, shut issues out along with your outdated registrar so that you don’t get billed or create confusion later.
Disable auto-renew for the transferred area, cancel any add-ons tied to it (like WHOIS privateness or DNS internet hosting), and take away saved cost strategies in case you now not use the account. Transfer something you continue to want over to GoDaddy. In case you have no different providers on the outdated registrar, you may delete the account totally; in any other case, simply go away it inactive.
This avoids unintentional renewals and prevents settings conflicts after your area transfer.
With cleanup achieved, you’re set—handle renewals, DNS, and safety out of your new registrar going ahead.
Closing Ideas About Transferring a Area Title
Transferring a website is simple once you observe your registrar’s course of: affirm eligibility, unlock the area, seize the authorization code, submit the switch, and confirm the small print afterward. Most strikes end inside every week, and plenty of might be authorised sooner at your dropping registrar.
Given how easy the method is—and the added advantages of decrease pricing, higher instruments, and centralized administration—shifting your area is commonly value it. Put together the few gadgets above and you’ll migrate with out downtime or surprises.